Monday, December 17, 2012

#Mmm: Saltie


Think maritime, think cozy, think sunny and clean. That's the atmosphere when you walk into Saltie, a cute bakery & sandwich treat spot on Metropolitan Avenue in Williamsburg. I ordered their recommendation for a dessert. Eying the options in the display, I knew I couldn't be disappointed: cranberry honey corn muffins, squash pockets and pumpkin oatmeal caraway cookies (pictured below). The server at the front jumped to the mousse immediately: a specialty of the chef standing nearby. "I'm so glad you ordered it," the chef noted, serving a dollop of rich chocolate into a white bowl, "cause I get to lick the spoon." On top she sprinkled a touch of coarse sea salt and a drizzle of, you'll never guess...olive oil. It is fantastic. Rich and flavorful, sweet with the bite of salt and a surprise of olive smoothness. The flavors accompany the chocolate in an unexpected medley of flavor and texture.


The owners and co-authors of the cookbook, Saltie, blend their various flavor comfort foods to invent recipes. Italian-American, Scandinavian-American and British-American: the combinations are inspiring. They use anise, rose, dried lavender flowers, currants and olive oil (and much more). Overall Saltie is an inspired collaboration; particularly for your taste buds. #Mmm.


Sunday, December 16, 2012

Unbaked: The Journey of Cookie Dough


My friend, Gordon, sent me his father's recipe for oatmeal craisin chocolate chip cookies. Naturally I made them, but this time I took a photo of each step. Having made cookies so many times, I realize that some textures come instinctively to me. I know when butter and sugar are "creamed" and when you beat an egg into the batter until "fluffy." But how do you sense all of this from a description without someone showing you what that looks like? Stir until just combined. Well, okay...but what does that even look like?

Cookies baked, I ended up with 8 photos of the process. And while that's helpful, 8 is a lot. I opened them all in photoshop and got an idea: what about a grid?

Voila. Here you have it: a step by step of making this delicious recipe for oatmeal chocolate chip cookies. Read left to right, top to bottom.


Oatmeal Chocolate Craisin Cookies 

3/4 cup brown sugar
3/4 cup granulated sugar
1/2 cup butter
1/2 cup shortening
2 eggs
1 1/2 tsp vanilla extract
1 tbsp maple syrup
1 1/2 cup flour
1 tsp baking soda
1 tsp kosher salt 
2 cups oatmeal
2 cups chocolate chips
1 cup craisins

1. Preheat oven to 375 F.
2. In a large mixing bowl, cream sugars, butter and shortening.
3. Add eggs one at a time, mixing well after each addition until fluffy.
4. Stir in vanilla then maple syrup until well incorporated.
5. In a separate bowl, whisk together flour, baking soda and salt. Pour dry mix into butter mixture and stir until just combined.
6. Add oatmeal, chocolate chips and craisins. Mix until well dispersed and dollop cookies by the tablespoon onto an ungreased cookie sheet or parchment paper.
7. Bake for 9-11 minutes or until the edges begin to crisp.
8. Devour.

Friday, December 14, 2012

Wine & Plum Chinese Chai Spice Cookies


This is my last installment for The Great Food Blogger Cookie Swap! I got them from Alyson of Wine & Plum. They're Chinese Chai Cookies--a delicious and buttery cookie that I enjoyed at all times of day (yes, I've literally had one with every meal). You can check out her recipe here. Thank you for the cookies!

Monday, December 10, 2012

#Mmm: Big Bear Bubble Tea and Macaroons


I'd never had French macaroons until I devoured those pictured above. It was a sweaty September day when I first stumbled upon Big Bear Bubble Tea and saw that the entrepreneur, Jessie, was going to introduce macaroons into her milky product line. Having tried them, all I can say is I am changed. These cookies are a revelation.

Jessie tried her first macaroons at a restaurant in the city, "I fell in love with the raspberry rose flavor" she said--a cookie that literally smells like roses, and tastes like cookie perfume (Jessie uses lychee to accentuate the tartness of the raspberry creme). Determined to recreate the wafer like cookies, she researched dozens of recipes until she found a perfect balance for her new store: Big Bear Bubble Tea in Woodside, Queens. The other flavors came from the inventive baker: matcha green tea, raspberry rose, vanilla bean, cinnamon dark chocolate ginger, chocolate passionfruit and lavender (pictured above). 

I'm converted. Along with a warm bubble tea (that's right, she makes warm steamed milk teas with tapioca for the winter), I can't get enough of these macaroons! The thin wafer crust melts into the creamy center, forming a blend of texture and flavor that unfolds as you chew. My favorite, the lavender macaroon, has all the decadence of a cupcake without any of the weight. It's soft to palatte and rich in nuanced flavor. All the macaroons are made on site in Jessie's adorable shop and soon she will feature more experimental flavors. "I want to make spicy cookies" she said, "something like tom yum flavor and a tropical longan fruit flavor." Jessie is Thai and says her grandfather has a longan tree back in Thailand. "I hope I can find longan good enough here to get the flavor!" I hope so to! And, tom yum!? I can't wait to try it! 

Check out Jessie's site and facebook for more info on how to get your hands on these #Mmm macaroons!


Friday, December 7, 2012

Bourbon Spiced Shortbread Cookies from Rebecca


I got my last batch of cookies today for the cookie swap and they are delicious! Careful holiday themed shapes in a lovely box. The bourbon is a subtle flavor, but it certainly adds a kick to a standard holiday recipe. Thank you Rebecca for the cookies!

Thursday, December 6, 2012

Getting Experimental: Curry Raisin Biscaitie

For the Great Food Blogger's Cookie Swap, I challenged myself to finally bake up an experimental Biscaitie flavor that my friend, Gordon, recommended over a year ago: curry raisin. I looked up recipes for curry confectioneries, and found that there are few. It's a savory spice, but think about it: curries are also sweet. In addition to the curry, I added subtlety to the spice to ease its "curry-ness." There's cinnamon, cardamom, and ginger, plus molasses, maple syrup and I soaked the raisins in vanilla and beaten eggs.

Curry Raisin Biscaitie

Dry Ingredients

3 cups flour
1 1/2 cups sugar
1 tsp baking powder
1/2 tsp kosher salt
1 tsp cinnamon
1/2 tsp ginger
1/4 tsp cardmom
1/2 tsp curry

Wet Ingredients

3 eggs beaten 
1 cup raisins
1 tsp vanilla extract
1/4 cup molasses
1 tbsp maple syrup

1. Preheat the oven to 350 F.
2. Beat three eggs in a small mixing bowl, add vanilla and raisins and let soak (about 15 minutes), stirring occasionally.
2. Whisk dry ingredients in a large mixing bowl until well combined.
3. Make a well in the center of the dry mound and pour the molasses, syrup and egg-raisin mixture into the middle.
4. Turing the dough over with your hands, mix the ingredients until well combined and form into two or three loaves (depending on the size cookie you desire).
5. Place loaves on a parchment lined cookie sheet and press flat. Using one beaten egg, glaze the tops of the loaves.
6. Turn pan into oven and bake for 30-40 minutes.
7. Once loaves are done baking, let them cool 5-7 minutes before slicing and returning to the oven for desired hardness.
8. Enjoy! 

Monday, December 3, 2012

Mocha Peppermint Cookies from Jenni


I got a beautiful dozen cookies from Jenni of Traveler in the Kitchen, and I must say, they're DELISH! They were mailed to me as a part of the Great Food Blogger's Cookie Swap. Rich in chocolatey flavor with undertones of mocha mint and a delightful peppermint drizzle, these cookies are truly a seasonal treat. What great presentation too! They came in a Christmas box with peppermint pine trees.

Thanks again, Jenni!

Friday, November 30, 2012

How Does Cooking Translate for a Baker?


I meant to bake today, but as I stared at the mournful vegetables in my kitchen, I decided it was about time they met in some medley before they reach the dump. I am not a cook. It's not that I don't cook, I just haven't ever focused on cooking in the way I bake. When I cook it's usually an effort to save ingredients that I purchased and forgot to use. They aren't bad, but verging on it.

Alright, that doesn't sound like a person you'd take a recipe from...but I signed up for a Skillshare class today called Creative Cooking: Design a Unique Recipe with Local Ingredients (it's free, so you should too!). I've always viewed cooking as a form of improvisation. The more you know about flavors and techniques, the better your improvisation will be, but the rest of it is like baking: your mood, ingredients and patience. The soup turned out well. I sauteed garlic, mushrooms and potatoes in red wine and spices (rosemary, basil, parsley) and added beans, carrot, and celery. Still, I call it my trial before I take the eat local course--that recipe I will share!

Thursday, November 29, 2012

Bake Till You Drop

On Sunday I nearly lost it. I mean sitting in a chair, face flat on hands: I can't bake anymore. I made 20 Biscaitie each for 15 different people, that's 300 Biscaitie all made out of my dinky home oven. On top of that was packaging: wrap them, bag them, tie a bow, label and cushion them, tape them up in boxes and trudge them down to the post office. I'm not ungrateful for the task, because running a baking company I realize is mostly figuring out the logistics. Plus the sense of accomplishment at the end was immense! But the whole "bake till you drop" got me thinking: what is it about starting a new process that can be so frustrating? 

It's the learning curve. I started a new job recently too. I'm a barista at The Queens Kickshaw in Astoria. As with starting my last job, there's a lot of details to remember fast when someone orders a drink. Everything has a place that it's kept, every drink has a cup it's prepared in, every second counts. But when you're learning you make mistakes. You do the wrong thing and it's the only way to seal the idea in your mind that no, an americano is does not go in the small latte cup.

The good news? Every time you repeat a process it gets easier. I now know all the things I need for my shipping including tidbits like "to" and "from." So long as you don't drop, you've learned something. With this in mind, I push on to the next order: this time 100 boxes to ship, followed by a holiday bazaar and a catered office Holiday Party!

Tuesday, November 27, 2012

What I Call Market Research...#Mmm

I'm starting a new initiative I call #Mmm (Magnificent Morsel Monday) which means I'm going to sample a new dessert every week (and write about it on Monday) so I can absorb ideas about flavors, meet amazing bakers and learn more about confectionery entrepreneurs. Please connect through this blog post, facebook or #Mmm @Biscaitie if you have any suggestions or know someone I should meet!

Monday, November 26, 2012

Baking a Winter's Tale


I haven't set up and sold Biscaitie since the Skidmore Market days in college. Lucky for me I stumbled upon a couple of Shakespeare entrepreneurs who have started their own Accidental Shakespeare Company. Imagine this: all the actors are cast and do not rehearse their performance until opening night. There are props strewn for them to play with and a tally system to keep them on track with their lines. It's like watching Shakespeare improv, and everyone is laughing.

Plus did I mention, there's plenty of wine too! I themed my flavors for the occasion:

Sprites and Goblins: Mint Chocolate Chunk
Pursued by a Bear: Chocolate Coconut White Chocolate Chip
The Hermione: Lemon Poppyseed
Bohemian Winter: Gingerbread
La Perdita: Peanut Butter White Chocolate

Here's to eating, drinking and being merry!

Tuesday, November 6, 2012

Peanut Nutella Yogurt Cookies


When I first heard about gluten free baking my friend, Hannah, introduced me to a simple recipe for peanut butter cookies. I forgot until recently about making such delights! I adjusted the recipe and discovered these make great tea cookies: small, crisp and sweet.

Quick&Easy Peanut Nutella Butter Crisps

1 cup smooth peanut butter
1 cup granulated sugar
1 tbsp nutella
1 tbsp greek yogurt
1 egg
1 tsp baking powder

1. Preheat oven to 350 F and line a baking sheet with parchment paper.
2. Mix peanut butter and sugar until well combined.
3. Add nutella, yogurt and egg and beat well.
4. Sprinkle baking powder over mixture and fold in until well dispersed throughout.
5. Make 1 tbsp sized balls out of the dough and roll them in a bowl of sugar (smaller sizes hold their shape better, as these are delicate cookies). Place the balls on the cookie sheet and press with a fork for a textured top.
6. Bake for 10 minutes or until the edges brown.
7. Cool, tray, devour.

Monday, November 5, 2012

Food for Thought and Thoughts on Food

People love to tune out on subways. It's a commute and for many, their only chunk of mental solitude in a bustling day of work and home life. And as I sit here, tuning out and subsequently trying to tune back in, I wonder: what is it that brings us all back together?

Well, food. Yes, we all love food. We love to socialize over food, express our culture and personalities through food. We celebrate with food and mourn with food. We meet over food and part over food. In fact, food interjects in our lives more times a day than most anything else. How much do you think about food? I would love to learn more about the impact that food has on our personalities. I read an article yesterday that claims the aroma of bread makes people friendlier. Think of all the times you've walked into a bakery and instantly felt more at ease. It's no wonder that we associate baking with comfort: it's built into feelings of nostalgia and the presence of good company--at least for those who have the luxury of such plenty. So here's to congregating over food!

Sunday, November 4, 2012

Oatmeal or Chocolate Chip?

I saw a Sugar Loco tweet this morning: "Raisin cookies that look like chocolate chip cookies is one of the main reasons I have trust issues." I definitely don't agree, but it does make me wonder, why do people have such strong opinions about food? What do flavors bring out in us that make us so passionate one way or another?

I was never a picky eater growing up. My parents adopted a firm policy of "you don't have to like it, but you have to try it." And there were a selection of desserts that I would not touch: all pies, cooked fruit of any description, and any combination of peanut butter and chocolate. Ha! It's funny now to think how much all that has changed... The trend started with watching my parent's eating habits and ended when I began to experiment with my own tastes and opinions about everything. I remember my first bite of pumpkin pie (after realizing that it must be good if everyone in the family devours it). It was fantastic and I knew I had to try more. Not only that, but I started watching my aunt and grandmother make pie so I could make more myself.

It's a luxury to be a picky eater, and there's a foundation that supports our specific tastes (granted some are completely involuntary, so geneticists say). When did you develop your habits?


Saturday, November 3, 2012

Chai Pumpkin Pie


I realized in the midst of my pumpkin obsession that pumpkin spice and chai spice are quite similar. The difference is that chai is a little more spicy--with cardamom and black pepper. So why not make the pie a little more spicy too?

I adjusted my trusted recipe for a richer flavor and was not disappointed:

Chai Pumpkin Pie

3/4 cup sugar
2 tsp cinnamon
1 tsp nutmeg
1/2 tsp ginger
1/2 tsp clove
1/4 tsp allspice
1/4 tsp cardamom

1 15 oz can pumpkin puree
2 eggs
1 tsp vanilla extract 
1 15 oz can evaporated milk

1. Preheat the oven to 425 F.
2. Prepare a single crust for your pie (either purchased or homemade).
3. Whisk the dry ingredients well in a separate bowl. 
4. Add pumpkin puree to dry ingredients and combine well before adding eggs one at a time followed by the vanilla.
5. Pour the evaporated milk in a small steady stream into the pie mix, stirring as you go.
6. Pour pie custard into prepared crust and bake in oven for 15 mins or until the exposed crust browns.
7. Reduce oven to 350 F and bake an additional 30 mins or until the center of the pie is firm.
8. Cool and place in the fridge until cold.
9. Share the sugar, delight in the spice.

Thursday, October 25, 2012

Pumpkin Butterscotch Blondies


I've never made blondies. I'm a huge fan of chocolate (if you haven't already guessed) so the idea of taking chocolate out of the brownie seemed illogical. But blondies have been presented to me multiple times in the past few months. First was with my friend Valerie, who shared a blondie she purchased at Dean&Deluca, second was yesterday when my manager told me to try the blondies they ordered at work to see if I could replicate it. Challenge accepted!

Note: When baking anything with pumpkin flavor, upping the dosage of spice makes the flavor more pronounced (after all what is pumpkin without the spice?). I also find that making your own mix makes for a richer and more complex flavor than the pre-made pumpkin spice blend.

Here is my recipe for some delicious gooey pumpkin blondies:

Pumpkin Blondies

1 1/2 cups baking flour mix (one recipe recommended almond & coconut flour)
1 tsp xanthum gum
1 tsp kosher salt
1 tsp baking soda
4 tsp cinnamon
2 tsp ginger
1 tsp ground cloves
1 tsp nutmeg

1 cup butter (2 sticks)
2 cups light brown sugar
1 egg
1 tsp vanilla
1 cup pumpkin puree
1 cup coconut milk
1 cup butterscotch chips

1. Preheat oven to 350.
2. Combine dry ingredients in a small bowl and mix well.
3. Cream butter and sugar in a separate bowl then add one egg and vanilla stirring well after each addition.
4. Mix in pumpkin puree and then pre-mixed dry ingredients. Once combined, add coconut water until batter is more like pancake batter than cookie dough. (*Why? Gluten free flours tend to soak up more liquid in the baking process than gluten-full flours. Adding extra liquid helps preserve the soft, gooey texture of blondies.*)
5. Pour mixture into pre-greased pan or a pan lined with parchment paper. Sprinkle butterscotch chips liberally over the top and bake for 30-40 minutes.
6. Slice and devour.

Wednesday, October 17, 2012

Pumpkin Pie


There are definitely benefits to having a baker in the house. For one thing, there is someone to make you pie when you want it. My housemate noticed a couple cans of pumpkin puree sitting out, so he ordered and paid for a pie. It was marvelous waking up this morning to make my favorite pie. I used the same recipe I've always used (yes, it's the one on the back of the Libby's Pumpkin Puree can) except I added more spice, and substituted sweetened condensed milk for evaporated milk. The pie is creamier and more flavorful.

Almond Chocolate Dipped Cookies


I tried to make marzipan for my mother's birthday. It was an arduous process, mostly because I've never attempted to make any candy from scratch. I found a simple recipe and followed it step by step, filling my sink with cold water, covering my cutting boards with powdered sugar and trying to gauge a "240 degree rolling boil" by instinct. All this and I ground the almonds myself in a coffee grinder--making them more thickly textured than marzipan should ever be. To finish them off (knowing the chocolate fiend my mother is) I set up a double boiler to melt various chocolates together to get the right bitterness and flavor to counter the sweetness of the varying shapes I molded.

In all, it's a lot of work. Then again, what recipe isn't the first time you try it?

After a final taste, I realize the final product is nothing even resembling marzipan, but as Almond Cookies (a gluten free natural) they turned out superbly. The texture works well so long as you don't expect it to be smooth, and the balance of flavors is altogether spot on.

Here's to more creativity inspired by my mom. Happy Birthday!

Tuesday, October 16, 2012

My Friend Impatience

Have you met impatience? We're much closer than I'd like to admit. Impatience visits me when I open the oven repeatedly to check on the rising status of a bread loaf and while I poke at a block of butter to see if it's room temperature yet. Impatience is there when I burn my finger on molten fresh-out-of-the-oven chocolate, and lingers around for my gluten free experiments as I fail over and over to reproduce the same recipe with new flour.

Baking is about the journey and not the destination. It's hard to expect that you'll produce something good if you don't take time to enjoy the process of getting there. I sample as I go, checking that there is enough banana flavor at the beginning of the muffin batter instead of cringing as I taste the finished product. And still I fail all the time. I've put effort into many things only to have them come out with the wrong texture, the wrong flavor, the wrong...everything. Impatience can dominate if you let it--a true symptom of product seeking.

So how do I deal with it? Well, I haven't figured out how to get rid of impatience entirely. My trick is to not look to the product as the ultimate goal. It seems impossible, I know, cause who bakes when they don't have a serious sugar craving? But if you find joy in the process then you won't feel quite so bad if the product is not what you expected. They say to keep your friends close and your enemies closer, so why not make friends with an enemy? Here's to my friend impatience, thanks for keeping me in the moment.

Monday, October 15, 2012

Apple Tart


I got a beautiful red tart pan at my first BK Swap and it sat in the cupboard for months before my own curiosity and a sack of aging apples prodded me to put it to use. My first question as a pie maker of course, is what the difference between a pie and a tart is. Well, a little research has proved that there isn't much of a difference. Tarts are often open faced with a finishing glaze and are thinner than pies, plus they are made in a pan without sloped sides. So far as this experiment went, the recipe is the same and the flavors are too. A much more interesting cousin to the pie however, is the galette. I must try that next!

Apple Tart Filling

8-10 small tart apples
1/2 cup sugar
4 tbsp honey
2 tsp cinnamon
1/2 tsp allspice
1/4 tsp nutmeg
1 tsp vanilla
1/2 lemon juiced
1/4 tsp lemon zest

1. Peel and core apples and save aside scraps for later (see below). Slice apples thinly and place in a large mixing bowl.
2. Add cinnamon, salt, nutmeg, lemon juice, lemon zest, honey and sugar and stir until all the apples are glazed with flavor.
3. Pour the mixture into the pre-prepared crust (halve the recipe) and bake at 425 for 15 minutes.
4. Reduce oven to 350 and bake for an additional 40 minutes.
5. While the tart is baking, take the remaining lemon and apple scraps and cook them over medium heat with 1/2 cup of sugar and 1 cup water for about 20 minutes.
6. Strain the cooked scraps and extract the reduction sauce--this will be your glaze!
7. Hot out of the oven, glaze the tart with sauce.
8. Let cool 10 minutes and promptly devour.


Tuesday, October 9, 2012

Sugar Loco

Thanks to Sugar Loco for a wonderful article about Biscaitie! It's great to spread the sugar around, so I'm going to throw a little praise their way too. Have you visited their site? Imagine it before you click the link: a website devoted entirely to all things sweet. Discoveries from all over the country of the nifty, tasty and sugary delights that creative bakers concoct. It's dessert porn with the visual effects of a sugar rush. Feast your eye-pettite, check it out.

Wednesday, October 3, 2012

Zucchini Bread


The local grocer has a great deal on old produce. They take the bruised and battered fruit & vegetables and wrap them (wastefully) into plastic take me away before I'm trash packs. I come upon them after browsing through the regular vegetables and stare in astonishment at the amount of food I can buy for only $1.50. Two days ago I got a vegetable block with artichoke, eggplant and zucchini. Nothing moistens up a loaf of bread or a chocolate cake like finely grated zucchini. I found a recipe for the zucchini bread (something I've been craving for months now) from Gluten Free on a Shoestring. Naturally, I made my own adjustments below:

Zucchini Bread

1 1/2 cups gluten free flour blend (I have a mix of quinoa flour, coconut flour and Bob's Redmill all purpose)
1 tsp xanthum gum
1/2 tsp baking powder
1/2 tsp baking soda
1/2 tsp salt
1/2 tsp cinnamon
1/4 tsp clove
1/2 cup granulated sugar
1/2 cup brown sugar
1 1/4 cup grated zucchini (I grated one full zuch)
2 eggs
1 ripe banana mashed
1/4 cup olive oil
1 tsp vanilla extract
1 tbsp honey
1/4 cup rice or almond milk
*optional*  1/2 cup chopped walnuts

1. Preheat the oven to 425 F and grease a standard loaf pan.
2. Combine dry ingredients including sugar in a bowl and set aside. Whisk well to smoothen any lumps.
3. In a separate bowl stir together eggs, zucchini, mashed banana, oil, vanilla, honey and milk until well combined.
4. Make a well in the dry ingredients and pour the wet in. Stir until just combined but do not over stir.
5. Bake bread in the oven until the top is browned (about 15 mins) then reduce temperature to 350 and bake until a toothpick inserted in the middle comes out mostly clean (another 15 mins).
6. Cool, slice and devour.

Tuesday, September 25, 2012

The Oven's Mark

I used to work in the dining hall at Skidmore College. Correction: I spent most of my time working at the bakery at the dining hall,  traying (and tasting, how could I resist?) cookies whilst talking with the pastry chefs. I vividly remember the warnings from Robin, Chucky and Matt about burns.

"Watch out hun, this rack is fresh from the oven," or "tray these ones first, the rest are much too hot!" I asked Robin once about her burns. They're inevitable. You reach for the wrong rack and OUCH! Or you pull out a hot tray and ZAP, there's a line across your forearm. Their battle scars were heroic--lining their skin like tattoos.

I'm certainly not that epic. I just haven't been baking long enough or to scale to earn my scar cred, but a little sloppy haste yesterday and I have a line and a bandaged hand to show for it. And the sick part, as I'm sure you've already guessed by the tone in this post, is that I revel in my burns. My battle wounds! The evidence that I made ten dozen Biscaitie, three batches of cookies, orange poppyseed muffins and mini cheesecakes all in one day. I'm careful, but enough working in a kitchen and I'm slowly becoming branded a baker.

What they Say About Practice


In one week I will have officially completed 3 months working at Odradeks! I finally have my routine down and that allows me to experiment with baking and of course, improving my latte art. I had a particularly good run today of pouring (helped by a sunny day, a good night's sleep, and the friendliest smiling baby). I snapped this photo before I handed a very happy customer his drink. "I come for the art, not the cappuccino." Aw. Well, it feels good to be appreciated.

Thursday, September 20, 2012

BK Swap Haul


Another wonderful night! I got: Pumpkin cake cookies, snickersnaps (a combo snicker doodle-gingersnap), lemon cardamom cookies, homemade soymilk, hard cider, xxx spicy relish, Earl Grey granola, roasted garlic spread and spicy dill pickles. I got home late (after dancing) and ate a ton of relish. It's amazing! I can't wait to indulge in the rest of it. Thank you BK Swap! Thank you Mealku!

BK Biscaitie

On my way to my second BK Swap hosted at Mealku in Tribeca. I made Mint Chocolate Chunk, Mexican Hot Chocolate and Chai Biscaitie. Stay tuned to see what I bring back!

Belated Cheesecake


I'll be honest, I've never baked and not referenced a recipe. Sure, I've memorized recipes and not looked at them, but completely improvising from what I know? Never done it until this past rainy Tuesday afternoon.

I've been craving mint chocolate. Surely it's the arrival of fall that brought it on--who doesn't love a peppermint mocha? That and playing with flavored chocolate is utterly delightful. How did it turn out? Not good. Not bad either, the flavor is right but the texture is all wrong: crumbly instead of fudgy. The only bright side to desserts with the wrong consistency is that they can make a great base for something else. It's like you bought a box of pre-packaged cookie crumble to make a pie crust out of. Or a mini cheese-cake crust.

Well, I've had some cream cheese sitting in the fridge for over a week now, so I put it to use. Here is the recipe for the cheesecake:

Mini Cheesecake*:
16 oz creamcheese room temperature
2 eggs room temperature
1/2 cup sugar
2 tsp freshly squeezed lemon juice
1 tsp vanilla

1. Preheat oven to 350 F.
2. Cream creamcheese and eggs in a bowl until well combined.
3. Add sugar and combine well, then lemon juice and vanilla.
4. Pour mixture over prepared crusts in muffin cups (really this can be any dessert that has the right flavor and the wrong texture. The drier the better).
5. Bake for 25-30 minutes or until the center no longer jiggles when moved.
6. Enjoy!

*Recipe based from Simply...Gluten Free  by Carol Kicinski.

Friday, September 14, 2012

Applesauce


Is it really that time of year again? I anticipate autumn for all of August (and some of July...well maybe it starts in June). Apple cider donuts, apple picking, acorn squash and pumpkin pie. It's harvest season and the best time of year to be in the northeast. My sister came home with a sack of apples on Tuesday after a birthday visit to an orchard upstate and I've been staring at it longingly all week. Amidst my morning routine of coffee brewing, greek yogurt eating and checking email, I threw in some apple peeling and voila! Applesauce. I always imagine it will last me into those cold winter evenings when I crave warm autumn flavor, but let's face it, the sauce will be gone before the weekend is out.

Applesauce

1 cup water
1/2 cup honey
1 tbsp cinnamon
1 tsp salt
Juice of one lemon

1. Peel, core and quarter the apples. I take a large saucepan and fill it with apples as I peel them to get an idea of how many will fit (usually 10-12).
2. Add ingredients to prepped apples and mix well before covering and bringing the mixture to a boil.
3. Reduce heat and let sauce simmer for 20-30 minutes.
4. Take in the scent of autumn and warm your soul.

Wednesday, September 12, 2012

Peanut Butter White Chocolate Biscaitie


Who knew that it'd be a good combination? I'm a huge fan of dark chocolate and peanut butter so I never tried peanuts with white chocolate. I was pleasantly surprised! The sweetness of the chocolate is countered nicely by the salty peanut butter (especially if you get all natural creamy peanut butter). I'm curious about trying peanut butter with texture next. I imagine the extra crunch could be very nice. As for the chocolate drizzle (you were deceived by the photo, no?) I couldn't resist...it's a fun way to draw on food, and surprisingly hard to pull off! Want one? Stop by Odradeks in Kew Gardens!

Sunday, September 9, 2012

The Improvised Kitchen

You scrape together the ingredients for dessert, lay them out and realize you're missing one thing: the right pan. Baking in a variety of poorly equipped college kitchens, I've learned a lot about how to simply "make it work."

Inspired by my step dad's innovation for my sister's angel food birthday cake (listed below), I've compiled a list of go to baking tricks when you don't have the right picks:

Bundt Cake Pan (Credit to James Racheff)
 A tin can in the center of a circular cake pan works well when you don't have a bundt pan. Be sure to grease the can well!
Double Boiler

 I like to use two stacked pots although a bowl over a pot works as well. The nice thing about the pots is having a handle to grab as metal bowls get very hot over boiling water.

Rolling Pin
Any bottle works well for rolling out dough although I am a particular fan of wine bottles because they have more weight. Nalgene style bottles work as well. Be sure to take off all labels and rinse well.

Sifter
If a recipe requires sifting, try whisking the flour or sugar in a bowl rigorously instead. This breaks up the chunks for a finer texture. A tea strainer works as well if you have one big enough.

Let me know if you've come up with any of your own and I'll add them to the list!

*All illustrations courtesy of yours truly. 

Wednesday, September 5, 2012

The Plus Side to Bad Baking

I made the worst breakfast ever yesterday. And I made it twice. Worst of all? It was an attempt to make my sister's birthday breakfast. First attempt: gluten free crepes with banana and mango, a simple recipe from my guru. Result? Salty sweet, thick & eggy omelets.  Second attempt: gluten free pancakes. Result? Soggy chickpea flavored patties. Yuck and yuck. I felt terrible. An hour of work with nothing to show for it.

Baking is an art. The preparation, presentation and aroma, the taste, texture and scale: they all contribute to the same basic elements of design. I studied art for 8 years, so it's hard for me to think in other terms, and I've learned that the creative process cycles. I saw a great Ted Talk from Elizabeth Gilbert (check it out here) where she discusses how the Greeks and Romans viewed creative genius as a separate being from oneself. Instead of taking all the credit for your successes, and punishment for your failures, the muse is the culprit of all things and comes and goes as they please. And my muse has not been with me...I have bakers block.

Of course I've been baking. I made 5 more loaves of cornbread, cooked more peaches in the residual basil sauce and even had the birthday breakfast bust. But sparks of genius are far from your control and the rest is discipline. Keep at it. Don't give up. Bake crap, throw things away--it's the bitter process of learning. The easy part is to practice with what you already know, and the hard part? To take a risk, fail, and continue forward.

Friday, August 31, 2012

Article on Biscaitie

Well, I'm feeling utterly flattered. Turns out one of our regular cafe goers, Jay Flemma, is also a fantastic writer. Check out his wonderful review of Biscaitie and Odradeks here.

Wednesday, August 29, 2012

Cornbread

I had the worst craving. My cousin, Vanessa, posted a photo of her blueberry cornbread and I've wanted some ever since. I invested in a good textured cornmeal and set to work this morning. The apartment still smells delicious, and three slices in, I am very satisfied.

My recipe is as follows for (gluten-free) Cornbread:
 
1 cup cornmeal (I used Bob's Red Mill)
1 cup coconut flour
1 heavy tsp xanthum or guar gum
1 tsp kosher salt
4 tsp baking powder
1/2 tsp baking soda
2/3 cup granulated sugar
1/4 cup softened butter
1 cup soy milk 
2 eggs

1. Preheat oven to 425 F and grease a baking pan (I tend to use whatever rectangular pan I have).
2. Mix dry ingredients together and whisk throughougly to combine/add some air to the flour.
3. Add butter to dry and pound in with a wooden spoon until it is well dispersed.
4. Whisk eggs and milk and pour into dry mixture.
5. Stir until just combined (over mixing ruins the airy quality).
6. Pour mixture into greased pan and bake from approx. 25-30 minutes. Check the center with a toothpick before turning off the oven and stuffing your face.

Monday, August 27, 2012

Ice Cream Sandwich

Break time at work and I needed a snack. I used the last of the spare dough (from the previous post) and made two thin under baked cookies as the parenthesis for my sandwich. The rest is vanilla ice cream, chocolate chips and sliced strawberries. A simple experiment at first, with a lot of potential for growth.

Odradeks Chocolate Chip Cookies


The recipe I use is here. My boss is a huge fan of chocolate chip cookies without chocolate chips. So I use this recipe but make the dough chipless and add them on top at the end (in my signature pattern) to satisfy both cravings. The ground walnuts are a perfect substitute for the chips, adding flavor and texture to an otherwise simple cookie. Here are my adjustments:

Delicious (Gluten-full) Chocolate Chip Cookies

1 cup butter
1 cup sugar
1 cup packed brown sugar
2 eggs
2 tsp vanilla extract
3 cups flour
1 tsp baking soda
2 tsp hot water
1/2 tsp salt
1 cup walnuts run through food processor

The Crane Factory


I haven't forgotten one of the original purports of this blog: sharing 1,000 cranes. In fact, I've started a system of making cranes in bulk. Each stage of crane creation has its own jar and they occupy our window as decoration. I have no idea how many I've created, but there are 4 more chains on their way out into the big wide NYC.

And the tally: 150 (from before) + 60 (from these 4) = 210 cranes made

Saturday, August 25, 2012

Basil Peaches


It's the end of peach season and I've been attempting a peach dessert since I first saw peaches in July. The trouble is I always eat them, not that I've ever bought enough for a whole pie or anything...but ripe local peaches are just so flavorful!

Well, I finally did it. I noticed the seller at the Union Square Market was tossing away the bruised and battered peaches with undesirable holes and depressions. I asked if I could buy them cheaper to make into a pie and she was willing. This is a great tactic to try with cooking fruit. The lesser parts can be cut out and the residual fruit (if picked recently) is utterly fresh and supremely good. I had the basil from my dad and step-mom's garden. The recipe is borrowed from Food52 and the link is here.

That said, I made some alterations:

Basil Infused Peaches

3/4 cup white wine
1 cup sugar
1 cup water
1/4 cup 100% pomegranate juice
1/4 cup honey

The rest of the recipe is as the website indicates. I HIGHLY recommend it. This is one of the greatest desserts I've ever had. (A bold statement, I know!)

Friday, August 24, 2012

Wait, What Did You Put in That Pie?

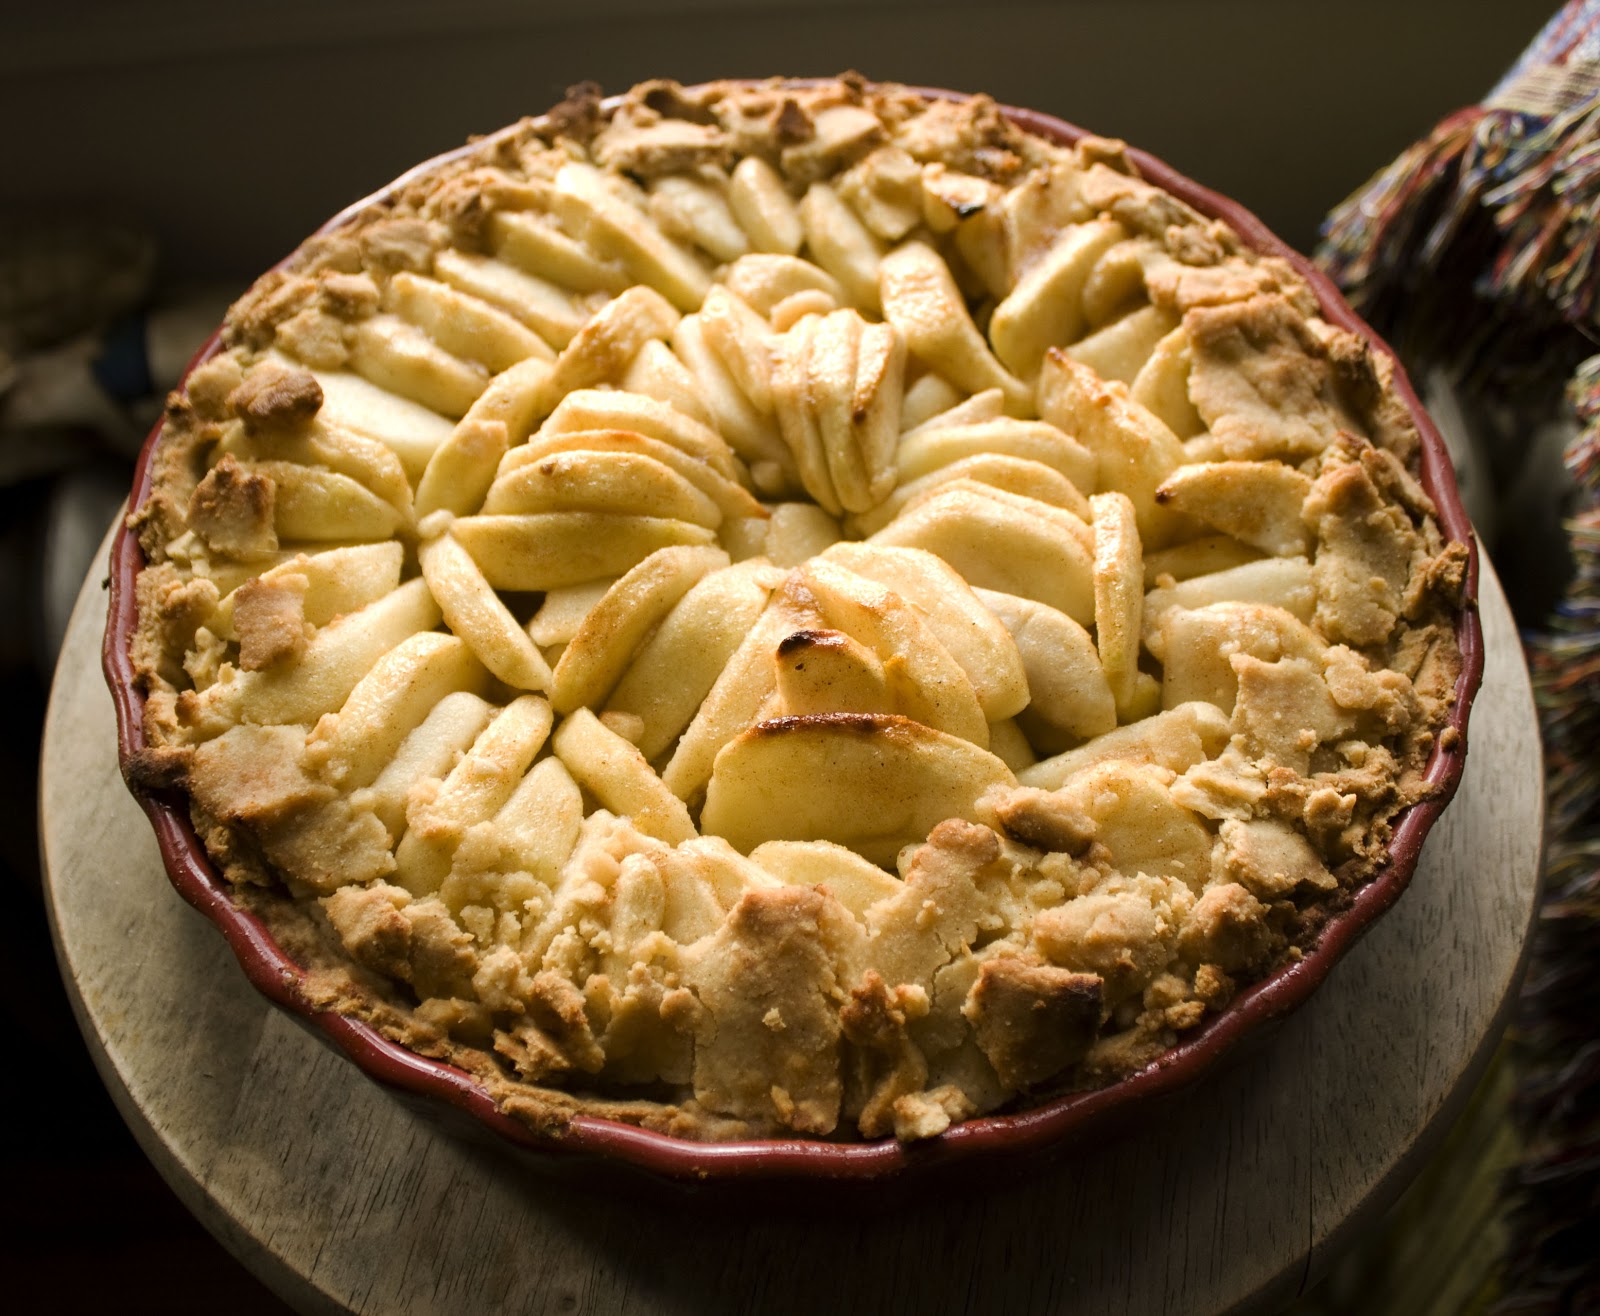
I'm getting more experimental with my baking. There's a certain point where you've done a recipe so many times that it gets, well, boring. So I've been throwing the recipes aside and following through with some of the what-ifs. And this is definitely a what-if pie. It turned out well except that I was over zealous with some flavors and forgot to add enough sugar. There isn't anything a scoop of ice-cream can't fix but I changed the amount below so you can do it better.

As for the fruit, I took everything we had: a pint of forgotten blueberries, two plums, and a bag of frozen mixed berries as well as a couple roasted beets for kicks. (I know what you're thinking, beets? Well, I'm convinced a vegetable that sweet definitely has its place in the dessert world. I don't recommend it for this pie, but I'm through with my theory!). I also added a little sweet white wine. I'm not sure it made much of a difference, so its place might remain with savory fruit blends. The best success of this pie is the crust, a perfectly flaky and buttery gluten-free mix.

For Crust:

2 1/2 cups gluten free flour blend (I use a mix of the King Arthur Flour and Bob's Red Mill, I think the more variety you have in the mix, the more disguised the gluten freeness).
2 tsp xanthum or guar gum
Pinch of kosher salt
1/4 cup softened butter
1/2 cup shortening
6-8 tbsp cold water

1. Preheat oven to 425 F
2. Whisk the flour, gum and salt together well. The more you whisk the finer the texture of the flour. It's like sifting without the sifter, a trick that works well to smoothen out undesirable chunks of bean flavor.
3. Add the butter and shortening in pieces and combine in the mixture until there are pea sized crumbs. I like to mix by hand.
4. Add water in stages and fluff with a fork until the mixture comes together willingly into two balls.
5. Take a sheet of plastic (I re-use plastic bags for this) and roll the crust out in between two layers, using flour to dust both sides. Measure the circle you roll to approx. the size of your pan.
6. Place the pie tin upside down over the crust and slip your hand under the plastic sheet to flip the dough into the pan and form it to the pie tin shape.
7. Roll out the second crust the same way.

For Filling:

1 pint blueberries
2 pints mixed berries
2 plums
Whatever other fruit you need to use up
Juice of half a lemon
1/4 tsp lemon zest
1/4 cup honey
3/4 cup sugar
2 tbsp minute tapioca
2 tbsp gluten free flour
2 tsp cinnamon
Dash of nutmeg

1. Add all the ingredients together and stir until well combined. You can usually tell just by tasting if you need more sugar or citrus to balance out the flavor.
2. Pour the mixture into the pre-made crust (above) and cover with the top crust.
3. Pinch the two layers together, removing excess crust as you go.
4. Paint the top with an egg wash.
5. Cut a hole for ventilation.
6. Bake at 425 for 15 minutes or until the crust is crisp, then reduce heat to 350 until you fill your home with the smell of fresh baked pie (approx. 45 minutes).
7. Cool for 20 minutes and ENJOY!

Wednesday, August 15, 2012

Watermelon Thumbprints

Thanks again to BK Swappers, I had a delicious jar of (labor intensive) watermelon jam. It has all the flavor of watermelon and the perfect texture for jelly. I'm still shocked that something so ethereal in texture could yield jam! Borrowing Kicinski's recipe for thumbprints, I made a simple dough to match the flavor. Unfortunately I forgot to add my xanthum gum, so these cookies turn into a jam cookie paste soon as you get them to your mouth (and that's if they don't crumble on their way!) Hopefully this is a lesson I only need to learn once.

We Three Gluten Free


I've been trying to figure out how to optimize my cookie dough, not just in terms of flavor, texture and eye-ppetite, but in how much I can do with just one batch. Kicinski's gluten free cook book has a great recipe for Snickerdoodles (pictured here in the right corner). I took the rest of the dough and experimented, adding a touch of ginger and butterscotch to some (center) and chocolate to the others (left). My sister had the grand suggestion of a spicy chocolate flavor in the next experimental batch, and I think some cocoa and coconut flakes would taste delicious too (especially since I used coconut flour for this recipe). The tough thing with gluten free dough is keeping the texture right after baking. I find that the shortening helps as a thickener and smaller sized cookies hold their shape best.

Here is the recipe with my alterations:

3/4 cup of soft unsalted butter
1/4 cup shortening
1 1/2 cups sugar
2 large eggs at room temperature
1 tsp. vanilla
2 3/4 cups coconut flour
1 tsp guar or xanthum gum
2 tsp baking powder
1 tsp kosher salt

Bake at 350 F for 12 to 15 minutes. 

1. Cream butter, shortening and sugar with a wooden spoon.
2. Add eggs one at a time, then vanilla.
3. Whisk dry ingredients together in a separate bowl and stir into the wet until just combined.
4. Form tablespoon sized balls and roll them in cinnamon sugar, chocolate chips, butterscotch, anything that you thing might taste good, and give them a re-assuring flattening pat before baking.
5. Let cool a few minutes before moving to a wire rack.
6. Enjoy!

(Recipe based off of "Snickerdoodles" in Simply...Gluten Free Desserts, by Carol Kicinski)

Thursday, July 26, 2012

BK Swappers, Thank You!

Who knew that you could spend a couple hours baking and come home with breakfast, lunch and dinner , drinks to share with your roomates and flavors to savor for many months to come. I got a tart pan, wild rice salad, hard cider, hot sauce, dried chipotles, cider, ginger beer, watermelon jelly, granola and garlic. All of it local, all of it homemade, all of it an utter DELIGHT. I couldn't have met nicer people. Thank you BK Swap! Thank you Krrb & Local Roots NYC, thank you to all the amazing home chefs.

Tuesday, July 24, 2012

Bait for Tasters

Two important events this week prompted the creation of these little sample bags...the first of course is BK Swappers, an event in Williamsburg this Thursday night where I'll be trading my homemade Biscaitie for various other homemade delights. I can't wait! To find out more, check out this link:

http://bkswappers.tumblr.com/post/26416739894/a-food-kitchen-swap-on-july-26

It's not too late to sign up if you're interested in joining in the bartering fun!

You'll be hearing more about the first soon so stay tuned... :)

(GF) Banana Muffins

Moist, flavorful and fluffy. I was so eager to eat them that I practically burned my mouth with the first bite. There's something to this whole, wait until they cool thing... Overall, a big yum for the gluten free muffins! Here's hoping we get some more old bananas soon.

Thursday, July 19, 2012

Your Eye-ppetite


As I edited the photo of my peanut butter brownie sandwiches, I played around with hue saturation. It's a lovely tool I discovered while photo editing in college. Move one little tab and the color scheme of the entire image changes from "normal" to pop-art. My housemate stared in disbelief, "it looks so gross in other colors" he observed, "only peanut butter can have that texture and be appetizing." It's true. Not only that, but the honey spilling onto the plate turned into a ghoulish drool in other colors. The angle, the texture, the shapes...they all play into our visual food vocabulary, or eye-ppetite, and wrong combinations disgust our mental taste buds.

We recognize texture and color and associate them with flavors, how we portray and consume visual food is a science. It makes me wonder, knowing the iffy flavors that are inevitable through experimentation, how many of the visually stunning photos of food that we look at are actually crappy tasting? Well, I've certainly had my share of exquisite yet flavorless birthday cakes.

I visited Perugia in the week I had off from my Florence abroad experience and my friends brought me to a bar that is famous for their tiramisu. When the platter was set in front of me I was surprised. Accustomed to square blocks of painstaking pastry layers, this tiramisu was a blob of freshly whipped cream with shavings of chocolate atop sloppy lady fingers soaked in rum and espresso . It looked decent, but presentation compared negligibly to the rich flavors that engulfed my taste buds. Whenever I see tiramisu in bakeries I wonder if they are all show and no flavor. I haven't found any that compare.

I am a strong believer in the power of presentation, but how we read something as good and know it, relies on two different senses. Although great looking food is not always great and vice versa, perking people's visual cravings is a skill just as finessed as fulfilling those cravings. There's no denying that eye candy is an easy addiction. So, here's to a growing eye-ppetite.

Wednesday, July 18, 2012

Peanut Butter Brownie Sandwich


Does it get better than chocolate and peanut butter? I'm a fiend myself, especially when the chocolate is dark and rich and the peanut butter smooth and all natural. I borrowed another idea from my Simply...Gluten Free inspiration but added a trendy twist: dessert sandwich. I've seen a lot of small time bakeries making more of their treats by stuffing them. The peanut butter in this gluten free dream bite has honey trickled on it for smoothness. I will definitely make this again. Yum!

Oatmeal Cookies...Like Never Before


I've found a gluten-free guru. The complexities of baking with different blends of flours impacts the texture and "gluten free-ness" of a given dessert. With the right combinations, so says Carol Kicinski in Simply...Gluten Free Desserts, you yield an unrecognizable and at times even better dessert than the gluten-full option. I found the cook book in the library amidst my "it's too hot to do anything but find AC" walks. I slipped into the baking section and had a lot of fun snooping around the cook books until closing. Kicinski was by far my best find! These cookies are delicious and were gone as soon as I could make them (I filled two tupperware containers). The best tip I learned? Grind half of the oats in a food processor before mixing them in. The finer texture works wonderfully to thin the cookies out, making them a perfect blend between the traditional crispy chocolate chip and flavorful oatmeal raisin.

Friday, July 13, 2012

Caramel Chocolate Biscaitie


Odradeks is now sporting a fancy jar of freshly made Biscaitie on its counter and lucky for me, I have new ingredients to play with. Their dark chocolate morsels go fantastically with swirls of caramel. I sampled them for customers today, we'll see how long they last!

Thursday, July 12, 2012

Gateau au chocolat


My friend, Clara, is from France and she visited Saratoga frequently while I lived there. A couple times she baked what she calls "Chocolate Dripping Cake" for me and my housemates. It's a delicious rich and flour-less cake with a thin crust and gooey center. I combined her recipe with some of the gateau recipes I researched online (I was attracted by the idea of whisking egg whites: a great way to let out your frustrations from the day). I also used some of the 100% cocoa my friend, Gabby,  made at Suenos Farm in the Pinchincha region of Ecuador. The extra bitterness was countered with a little white chocolate and some semi-sweet baking chocolate. Naturally, I was impatient and didn't let the cake cool long enough so it wasn't perfectly formed when I plopped it out of the pan. I substituted a tea strainer for a sifter to decorate and improvised two pots for the double boiler. It worked well! Overall, the flavor is rich and the texture just right.